How To Set Up A DIY Mimosa Bar
Learn how to set up a DIY mimosa bar for parties! Simple, yet impressive, it’s a fun treat at showers and brunches. Tips and suggestions included, as well as plenty of different juice ideas for variety.
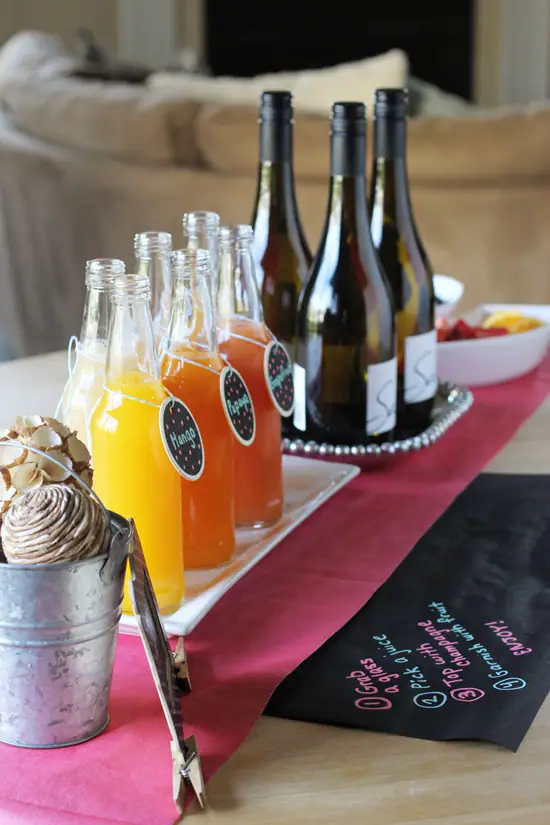
I have something super fun for you today – a DIY mimosa bar!
Plus, a little bubbly seemed like a good way to kick off the start of the week.
So. With it being springtime and all, I thought now would be an appropriate time to share this post with you.
I feel like spring and summer are the height of showers and brunches and all that jazz. And what better way to impress your guests than with a fun mimosa bar?
It’s so simple yet just so fun.
I’ll be the first to admit that I don’t really love regular mimosas. I’m not a huge orange juice fan, so they don’t do it for me. But when you give me options for the juice? I’m all over it.
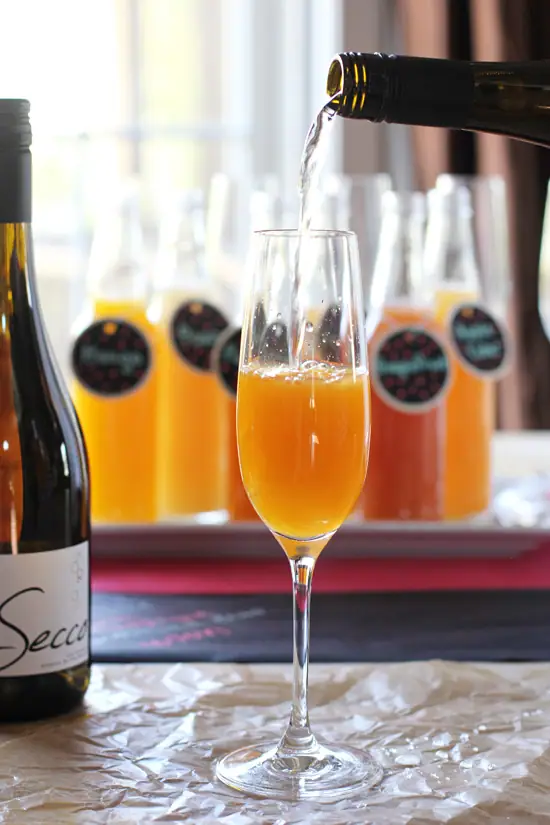
And on that note, you can use prosecco or champagne here. My group of friends and I prefer prosecco over champagne, so that’s what you are seeing here today in the pictures.
But use whatever you like! (The prosecco shown is from Trader Joes <— not sponsored. It’s just my favorite cheap and tasty brand)
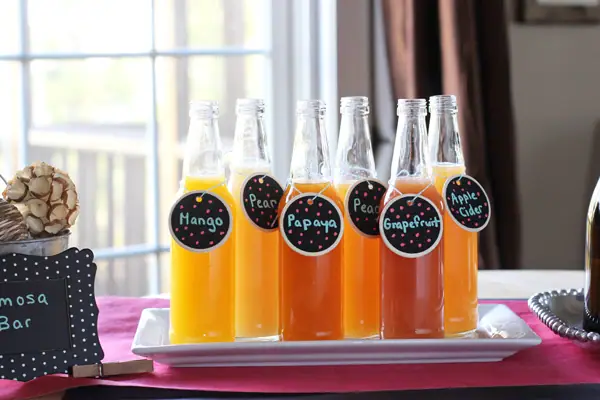
So let’s get to this.
Components Of A DIY Mimosa Bar
There are really only a few components to setting up your own mimosa bar:
- different options for juice (a list of ideas is included at the end of the post)
- champagne or prosecco
- fresh fruit for garnish
Set each of these up on your table in the order that your guests will assemble their mimosas.
The Fun Details
Now, let’s talk about the fun extras to make your mimosa station a little pretty.
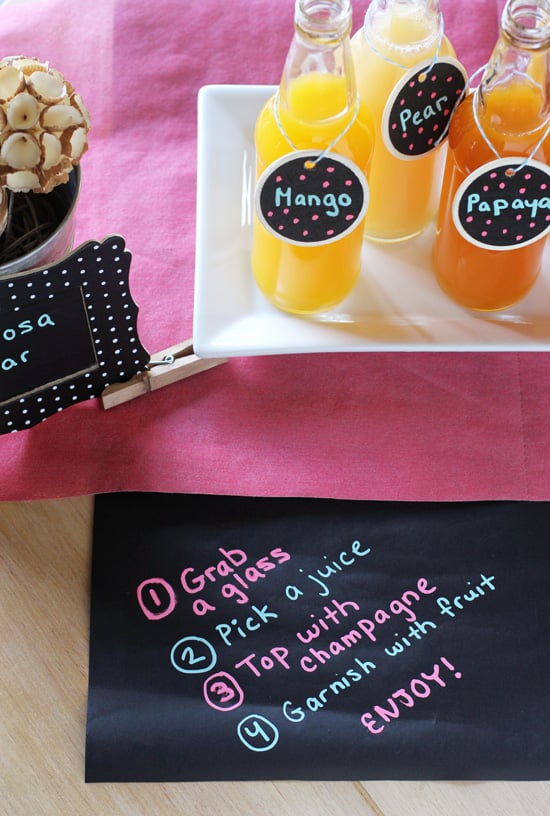
All the tags that you see in the pictures were from our local craft store.
I used chalk markers to write everything out and baking twine to hang the tags from the jars.
I do think it is important to label the different juice options, so that your guests don’t have to be constantly asking you what they all are.
The jars that you see are just individual soda bottles (also from our local craft store).
What I loved about this set up is that you can have other bottles of juice already filled and ready to go in your fridge – that way if your guests go through a flavor, you can just pull another one out and then just slip the hanging tag onto the new bottle. Easy peasy.
Tips & Suggestions
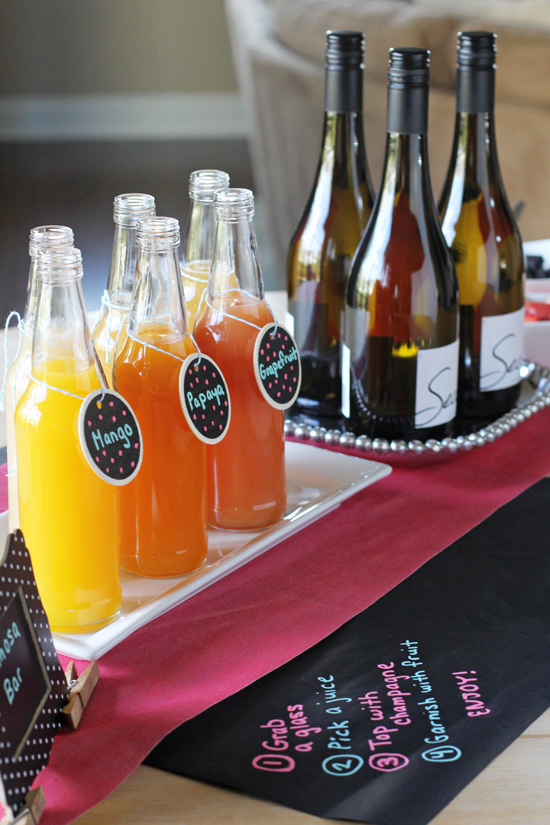
- Make sure that you have plenty of champagne flutes or whatever type of glasses you plan to serve the mimosas in. These can be real glasses or just disposable ones.
- Make sure that everything is nice and chilled. I don’t have any sort of containers that I can put ice in and leave out, so I put smaller quantities out at a time (and kept the rest in the fridge and replenished as needed).
- If you are like me, you won’t be able to resist dressing up the table a bit. I had a simple “mimosa bar” sign and wrote out “instructions” on chalk paper. Just to pretty it all up.
- I also think it would be nice to set out some sparkling water for guests who don’t want alcohol. This way they can still get in on the fun and enjoy something bubbly.
Did you make this DIY mimosa bar? Rate and review it down below! I’d love to hear from you.
How To Set Up A DIY Mimosa Bar
Learn how to set up a DIY mimosa bar for parties! Simple, yet impressive, it’s a fun treat at showers and brunches. Tips and suggestions included, as well as plenty of different juice ideas for variety.
Ingredients
Juice ideas:
- orange (or blood orange) juice
- apple cider
- grapefruit juice
- pear juice
- mango juice
- papaya juice
- peach juice
- guava juice
- passion fruit juice
- pomegranate juice
- watermelon juice
For serving:
- dry champagne or prosecco
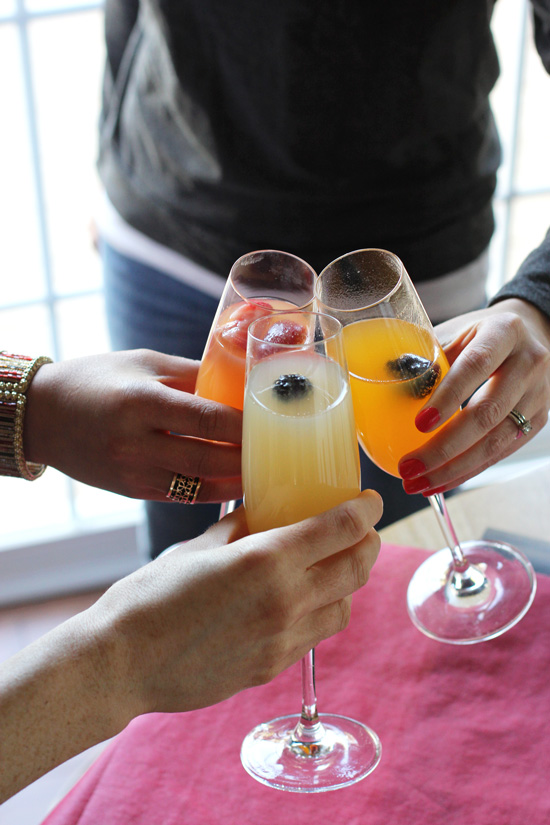
- fresh fruit for garnish (like berries, orange slices, etc.)
Instructions
- Pour desired amount of juice into a champagne flute (I like to fill half the glass with juice). Fill the rest of the glass with the champagne or prosecco. Top with fresh fruit for garnish. Serve!
Notes
Servings per bottle will vary - it depends on the juice to champagne ratio you and your guests use.
Prep time is just to pour a few mimosas - it doesn't include time to set up your entire mimosa bar as this will vary depending on how elaborate you go with the decor, etc.
Nutrition Information:
Yield: 1 Serving Size: 1Amount Per Serving: Calories: 114Total Fat: 0gSaturated Fat: 0gTrans Fat: 0gUnsaturated Fat: 0gCholesterol: 0mgSodium: 5mgCarbohydrates: 12gFiber: 0gSugar: 9gProtein: 1g
Nutrition data shown is an estimate provided by an online calculator and is for informational purposes only. It should not be considered a substitute for a medical professional’s advice. Nutrition info shown is for one mimosa made with 3 ounces of champagne and 3 ounces of orange juice.

This is such a cute idea! I’m not a huge OJ fan, but I love the idea of a grapefruit mimosa!
So fun!!!! I love all of the options here and your presentation is perfect! Not that I need convincing to hold brunch festivities, but this needs to happen soon!
What a fun idea! I would love it if you would link this up to Tipsy Tuesday at Grey is the New Black!
Oh it is like you are whispering sweet little nothings into my ear with this post. Yes to brunch and cocktails and so many pretty colored juices all lined up. Gorgeous and genius at the same time! XO
haha thanks Liz!
Best. Bar. Ever. Can we hangout…pretty please! Love this. Pinned.
Man, this looks like great fun!! So beautifully done Ashley, I wish you could come to my house and set up one of your wonderful bars!! Brilliant summer party inspiration, thank you 🙂
I just love this idea. I may not drink, but this still would be great for when I host a girlfriends lunch. Thanks for posting this.. my mind is just going with what I can serve with the mimosa’s :).
This is an amazing idea Ashley!! I wish I was at your house when you did this, hehe. All those choices look amazing! I never thought of different favored Mimosa!! Brilliant idea! 🙂 Now I need to have a morning party…mean brunch, hehe.
haha a morning party sounds fantastic!
I love this idea, and I wish I had of thought of this when I got married. It would have been perfect the morning of my wedding with my bridesmaids.
Thanks Dannii!
I honestly don’t think I’ve ever thought to make a mimosa with anything else but orange juice! I’m not a huge fan of orange juice either though, so I love the idea of adding in all these different juices! I wanna come to your mimosa party! It sounds like so much fun 🙂
It’s so much better with other flavors!! haha well at least in my opinion 🙂
Awww I love this!! So adorable… and I agree, I’m not a HUGE OJ fan, though I like a mimosa here and there…but mango juice and all of those other flavors sound even better!
The mango and peach were the favorites by far!
You really know how to throw a party, Ashley, and I would have gladly been a hand model for these photos! haha I think I’d go mango for the first one, and it might be hard not trying them all. 🙂 I love this idea and need to steal it. 🙂
Steal away!! 🙂
This looks so fun! I’ve always wanted to be at a party with a mimosa bar haha. Love all the juices you listed, I bet pomegranate or passion fruit would be SO good!
I love this post and want to set up a diy mimosa bar ASAP! So much fun. Cheers!
Oh my goodness, this is so much fun, Ashley! You seriously throw the BEST parties! I love all the details you put into your mimosa bar – it’s just perfect! 🙂
Aw, thanks Kelly!!
Move over Martha Stewart! Ashley is taking over! 😉
Seriously, you do such an amazing job at making everything so fun and pretty! This is such a cute idea and although I’ll happily chug a regular mimosa, I love that this offers a little variety.
haha you are too kind 🙂 Thank you!
There is nothing I love more in this world than some bubbles and this mimosa bar is pure perfection!
Yum!! Now I just need an occasion to make one of these 😉
I love the idea of hosting brunch with a DIY mimosa bar! I like mimosas and bellinis equally and would defintiely be up for trying different flavor/fruit combos!
Awesome post, and awesome pics! We will hand model for you anytime! 🙂
haha I will most definitely need your hand modeling skills again at some point 🙂 And thank you!
Easy peasy and fun!
Ashley – this is such a cute set up for a mimosa bar! I think I’ve said this before (during your meal planning posts) but, lady, you are one heck of an organizer! Do you offer up your party planning skills for hire? If you don’t…then something to think about… 🙂
Well thank you! 🙂
Pinned! My two best friends are getting married next year, so I’m all about bridal shower/bachelorette party ideas! Did you get all those fun juice varieties at Trader Joe’s too?
Yes! Trader Joes had lots of fun options! I also got one or two from Whole Foods (I think the papaya and mango maybe…)
Oh gosh, I LOVE this post so much Ashley! This is such an awesome idea with Mother’s Day brunch coming up next week! Love love the photography too—just stunning!
Thanks so much Sarah!
Your Mimosa bar is so cute. I love all the signs you made. Happy Monday Ashley!!!
Oh this is such a fun idea, Ashley! This would be perfect for mother’s day or summer parties. I love the ideas you provide and how you decorated! Definitely remembering this!