Chewy Cranberry Orange Granola Bars
These homemade thick & chewy cranberry orange granola bars are the perfect snack! Easy to make, plenty sturdy and freezer friendly, they’re an awesome grab & go option. Dairy free, gluten free and vegetarian.
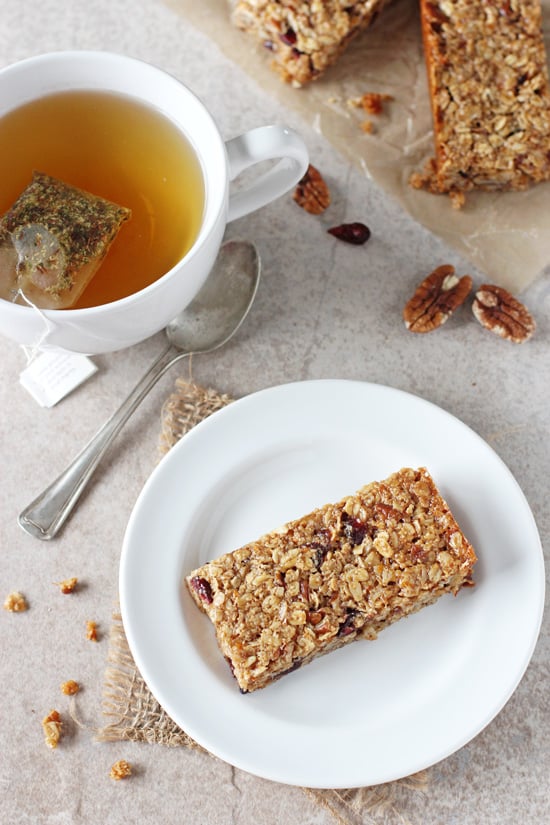
Today we talk these homemade thick & chewy cranberry orange granola bars!
And oooo baby are they good. So snack-able, so fun for fall. (Or, really, anytime of the year.)
They’re packed to the brim with rolled oats, warm spices, almond butter, cranberries and pecans, making for the most delicious simple snack.
And did I mention that they’re also totally sturdy & FREEZER-FRIENDLY? And also happen to be gluten free, dairy free and include a vegan option?
Yep, we’re so winning on all fronts.
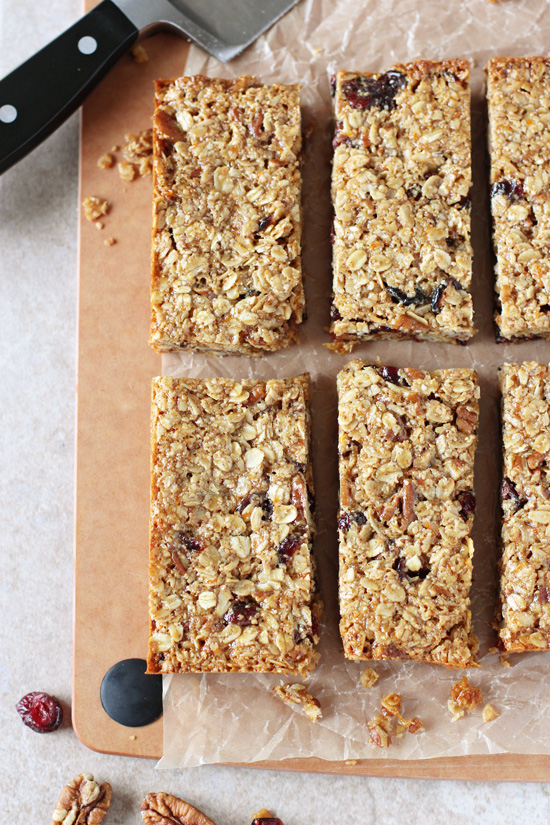
Tips & Tricks For These Cranberry Granola Bars
- Please, please, please stick with the brown rice syrup that is listed in the recipe. I have been working on perfecting these bars for well over a year now and the key really is the brown rice syrup. It makes the bars just so nice and sturdy. Trust me, I have tried with all honey and / or maple syrup and they just don’t turn out as well. Okay? Okay.
- Now that we have that out of the way, let’s talk options! To keep these bars vegan, just use extra brown rice syrup in place of the two tablespoons honey. I like the little bit of different flavor from the honey but they are still wonderful with all brown rice syrup.
- Be sure to use certified gluten free oats and oat bran if needed for your diet.
- Let’s chat mix-ins. You can absolutely use something else other than the dried cranberries and pecans. BUT. Be sure to use the same total amount. If you start messing with the ratio of wet to dry ingredients, it will throw off the recipe.
- I mention this down below, but you can store these bars either at room temp or in the fridge. They do last much longer in the fridge. Plus, I personally think they taste even better when cold (and they get even sturdier this way).
- If you are freezing the granola bars – I like to wrap individual bars tightly in plastic wrap and then pop in a freezer-safe plastic bag. When you are ready to enjoy, just move however many bars you would like to the fridge to thaw out.
Additional Snack Recipes You Might Enjoy:
- Chewy Fruit & Nut Granola Bars
- Toasted Coconut and Macadamia Energy Bites
- Chocolate Peanut Butter Energy Bites
- Oatmeal Raisin Energy Bites
- Banana Bread Breakfast Cookies
- Spiced Banana Bread Oatmeal Bars
Did you make this recipe? Rate and review it down below! I’d love to hear from you.
Chewy Cranberry Orange Granola Bars
These homemade thick & chewy cranberry orange granola bars are the perfect snack! Easy to make, plenty sturdy and freezer friendly, they’re an awesome grab & go option. Dairy free, gluten free and vegetarian.
Ingredients
- 1 ½ cups old-fashioned rolled oats
- ½ cup oat bran
- ¼ teaspoon ground cinnamon
- ¼ teaspoon salt
- ¾ cup dried cranberries
- 1 cup raw pecan halves, chopped
- ¼ cup melted coconut oil*
- ¼ cup creamy almond butter
- 2 teaspoons vanilla extract
- 1 tablespoon orange zest (from 1 large orange)
- 2 tablespoons honey
- ½ cup brown rice syrup
Instructions
- Preheat the oven to 325ºF. Line an 8x8 inch baking pan with parchment paper (cutting a big enough piece so that it hangs over on two sides). Lightly mist with nonstick or olive oil spray. Set aside.
- In a large bowl, mix together the oats, oat bran, cinnamon, salt, cranberries and pecans until well combined.
- In a medium bowl, mix together the coconut oil, almond butter, vanilla, orange zest, honey and brown rice syrup until well combined.
- Pour into the bowl with the dry ingredients and mix until well combined and everything is evenly moistened (it will be a very thick mixture!). Dump the mixture into the prepared baking pan and press firmly into an even layer.
- Bake for about 30 minutes, until lightly browned. Remove from the oven and set the pan on a wire rack to cool completely.
- Once completely cool, use the parchment overhang to lift from the pan. Use a sharp knife to cut into squares.
- Store at room temperature or in the refrigerator in an airtight container (they will keep longer in the fridge). I personally like to wrap the individual bars in plastic wrap - perfect for grab and go!
Notes
*Melt the coconut oil first then measure out the correct amount, otherwise you may use too much.
Feel free to cut these however large you like. If you cut them into rectangles, you’ll get about 8 large bars. Also, please be sure to wait until they are completely cool before cutting.
Nutrition Information:
Yield: 16 Serving Size: 1Amount Per Serving: Calories: 185Total Fat: 11gSaturated Fat: 3gTrans Fat: 0gUnsaturated Fat: 7gCholesterol: 0mgSodium: 38mgCarbohydrates: 21gFiber: 3gSugar: 10gProtein: 3g
Nutrition data shown is an estimate provided by an online calculator and is for informational purposes only. It should not be considered a substitute for a medical professional’s advice.


Oh gosh I really hope the construction ends soon, and good luck with all that coursework! You definitely have quite a lot doing – so don’t worry we will always be here! 🙂 P.S. these bars are a perfect peace offering – LOVE!!
You sound so busy right now Ashley, well done for getting blog posts out! These bars look and sound fantastic 🙂
My week has been busy and stressful too, so I totally hear you on needing ALL the wine and granola bars. These look SO beyond perfect for fall and I love how extra chewy they look!
Happy Friday, Ashely. I am so excited for everything Fall related at the moment and I need to make these bars soon. Loving all these Fall-tastic colors in this bar. Wish you a lovely weekend.
Have a great weekend Anu!!
You need some wine!!! I know I do lol. Love the cranberry and orange combo!
haha yes yes!
I’ve been on the hunt for the PERFECT granola bar, and I’ve totally found it. I’ve never used brown rice syrup, and I’m wondering if that’s what mine have been missing this whole time!
It seriously works wonders in granola bars! Between that and a little bit of nut butter they are impressively sturdy!!
I’m going to have to make a double batch of these, because my husband would eat them all before I got a chance to have one! Can’t wait to try these!
Every time I see a granola bar recipe I tell myself that I should give a try…yours look awesome Ashley…and I like the idea that you can freeze.
Hope you are having a fantastic week 🙂
I love the ingredient list! I dig some yummy homemade granola bars.
Hang in there lady!! Hope that the construction will be over & done with soon 😉
At least everything will be nice when your house is finished! And luckily you have lots of these granola bars to keep you company. Love the cranberry and orange combo!
Oh boy, do I remember those construction days. Definitely not fun with bugs and all but totally worth it in the end! Wine and granola bars sound like an awesome solution to me 🙂 Love all the goodies they’re loaded with.l
Thanks Kelly! Wine and granola bars to the rescue! 🙂
I need to start making my own granola bars again – it’s not that I eat a ton of pre-packaged ones as it is, but homemade is always SO much better. I love all of the flavors in this recipe! 🙂
Agreed! Thanks Jessica!
LOL I love that you kept that little typo in there. What’s it called when you say what you are subconsciously thinking? Freudian slip? Anyway these look delicious! Perfect for snacks or a packed lunch.
haha yes exactly!
We have plans to renovate our kitchen, so trust me I will be picking your brain… and I will absolutely let you vent! Buuut I don’t have any advice on the bug situation. That totally sucks… no nice way to put that! 😉 Just think, when it’s all over and done, you will have a kick arse kitchen! And I can come over and you can cook for me!!! hahahahaha! <3 Anyways, Love these granola bars, Ashley! Totally snack-tastic! Or if you are like me, I could just eat like 5 of these and call it lunch. Cranberry and orange are SO yummy together and totally make me think of fall, so I love that you used those flavors in here! Move over store bought granola bars, CNB granola bars are where it is at! Cheers, sweets… and good luck with your classes and the reno!
Yes! haha so much I can share! And you know, vent about 🙂 Thanks friend!!
Oh dear, that sounds like there is a lot going on. But granola bars make everything better! I would happily eat a granola bar every day and this flavour combination sounds delicious!
Granola bars definitely make everything better! Thanks Dannii!
Oh man. Bugs, dust, and people everywhere? I feel for ya, lady. Soon it will be a distant memory when you’re cooking up a storm in that purdy new kitchen. 🙂
These granola bars look so good! I’m a huge fan of cranberry and orange and I love the healthy ingredient list!
Sounds a bit stressful over there! Thankfully you have these delicious granola bars to keep you going 🙂 They look so good and I love the cranberry orange flavor!
oh goodness, life sounds busy right now! these bars look wonderful though 🙂 hope things ease up for you soon….and the kitchen will be worth it, i’m sure!
Help! I live in Peru and guarrantee that I can’t get brown rice syrup. There has to be a substitute! Pleeeeease!
Hey Graham! Oh no! There really isn’t a great sub … I will say that the recipe does still work with all honey. They just aren’t as sturdy! If you use all honey, one thing I’ve found that sometimes helps is to chill the uncut bars in the fridge (after they cool completely). And then cut into bars. It does help a little!
When my kitchen was getting renovated several years back I hated the dust that was everywhere — it was terrible! I feel for ya and hope it’s all over soon. 🙂 These granola bars look so good and I love cranberry orange flavors! Brown rice syrup is some magical stuff too, so I definitely will use that when I make these!
It really is – there’s a layer on EVERYTHING!! haha Thanks Marcie!
Haha – Ashley, I sure hope you get to have your wine for the week – and I will try my best to make up a batch of these uber healthy chewy cranberry orange granola bars that would be my idea of “wine” for the week! You have quite a full plate these days – hope you manage to stay as stress free as possible, my friend.
Thank you!!
Ah man, sounds like you’ve got a lot going on, plus having no privacy and dust all over is definitely stressful. Just think of how peaceful your home will be once it’s over 😉 In the meantime: cocktails and chewy granola bars. These bars look sooooo fabulous – the perfect breakfast or snack on-the-go. I’ll 200% use rice syrup, I pinky swear
That’s what I keep trying to focus on!! 🙂 Thanks Julia!
Those look delicious, I make loads of flapjack/granola type bars and will add these to my collection!
And you can still cook and bake while the house is under construction? That’s a talent!
These granola bars look fantastic!
haha oh gosh no! I was when we had a kitchen but that’s under construction right now too! I worked ahead so I have plenty to share! 🙂
O Fall in a bar! I love dried cranberries, adding even more CHEW to the bars!