Dairy Free Mint Chocolate Chip Ice Cream
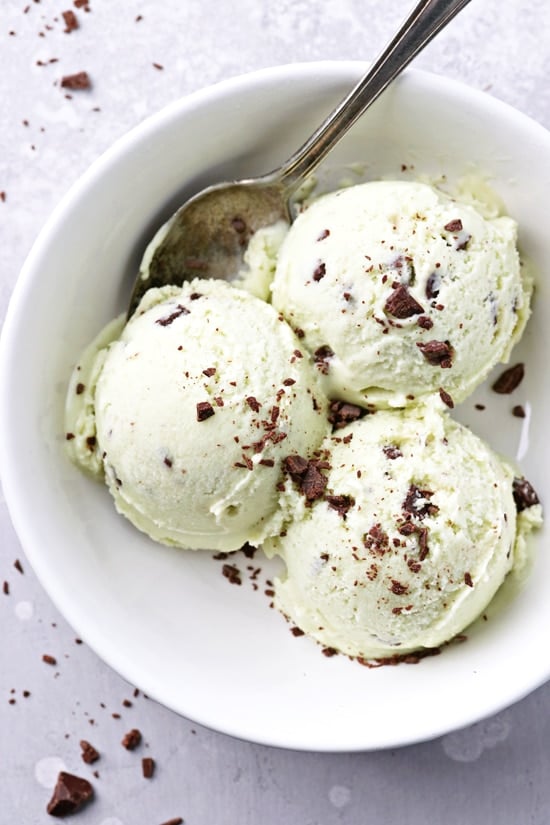
Rich, creamy and perfectly mint-y, this dairy free mint chocolate chip ice cream is a must for warm summer days! With the perfect texture and pale green color thanks to a secret ingredient, you’ll never believe this dreamy homemade dessert is dairy free, egg free, gluten free and vegan.
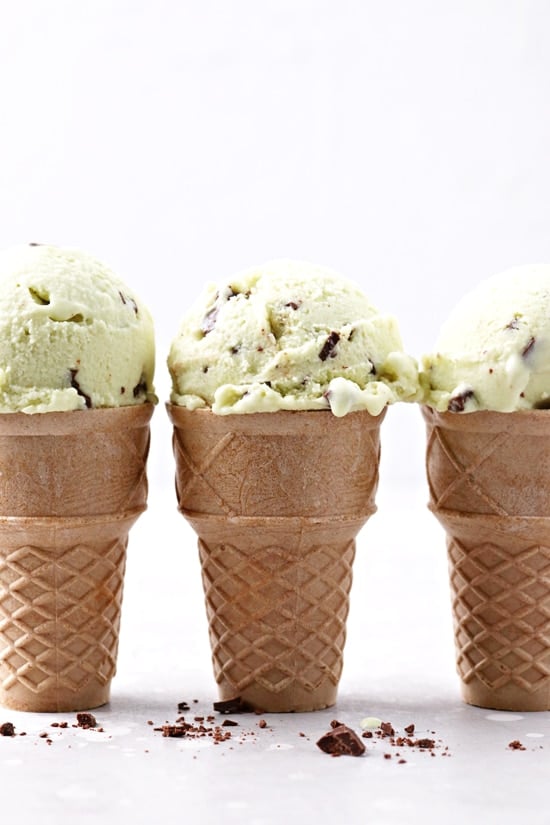
Mint + chocolate. It’s a match made in dessert heaven.
And when we combine that goodness with an incredibly smooth, creamy and luscious ice cream base?
We wind up with a sweet treat that is downright impossible to resist.
Added bonus? It’s completely dairy free thanks to a combination of coconut milk, oat milk and dreamy avocado.
Now, hear me out. You absolutely DO NOT taste the avocado.
It just gives the ice cream the perrrrrfect texture AND adds a bit of pale green color (without the need for any food coloring or dye).
Leaving you with some seriously swoon-worthy dairy free ice cream that is absolutely delightful anytime of the year.
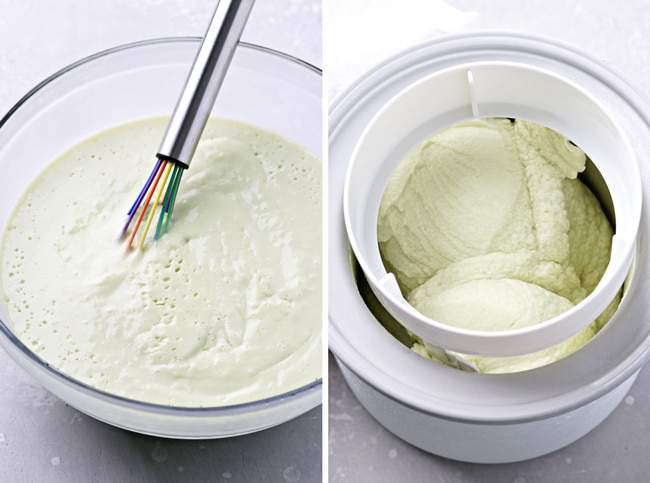
How To Make
So, let’s talk about how this delicious dairy free mint chocolate chip ice cream goes down.
Prepare base. First up, we’ll warm some coconut milk, sugar and salt in a saucepan until smooth, before whisking in a bit of oat milk, peppermint extract and vanilla.
Blend in avocado. We’ll transfer the mixture to a blender, along with some ripe avocado, and give it a whirl until combined.
Chill for several hours. Next, we’ll pop the mixture in the refrigerator until well chilled, about 4 to 6 hours.
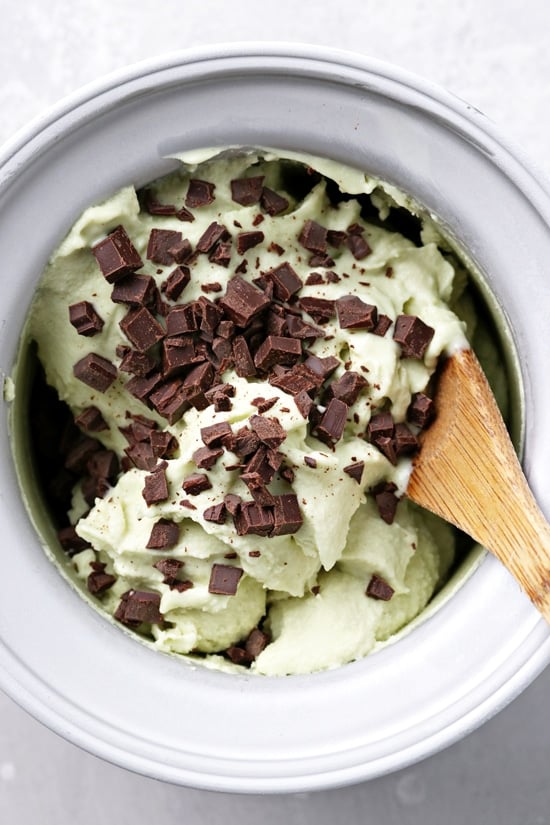
Churn in an ice cream maker. We’ll pour the chilled base into an ice cream maker and churn until the consistency of soft serve, before folding in some dairy free chocolate.
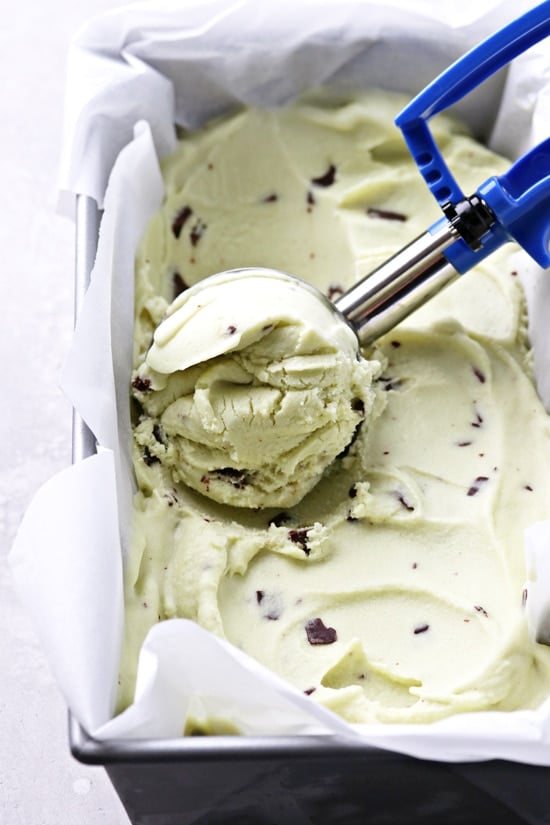
Freeze until firm. Finally, we’ll pop the ice cream in a container and stick in the freezer for about 2 to 3 hours, until hardened to the consistency of regular ice cream.
And then, we grab those spoons and dig in.
Tips & Tricks
- First things first. The full-fat coconut milk is non negotiable. Please do not try to use light canned coconut milk – you really need the extra fat.
- The same goes for the avocado – it’s there for the added fat which helps make the ice cream nice and creamy. I would not suggest skipping it – the results won’t be the same. If you can’t do avocado, you could maybe try cashew butter instead (which is fairly neutral in taste) … but I haven’t tested that myself.
- As far as the oat milk, I personally like to use either Chobani Plain oat milk or Oatly Original oat milk (not sponsored, just what I prefer!). With that said, other oat milk brands will totally work as long as you do NOT use anything that’s low fat or light. Because again, we want the extra fat.
- Feel free to adjust the amount of chocolate chips or chopped chocolate to taste.
- And finally, the optional vodka. Because homemade ice cream doesn’t contain any preservatives or fillers, it freezes harder than store-bought versions. Vodka doesn’t freeze, so adding a touch to the ice cream helps make it more scoop-able and softer in texture. It’s not necessary but I’ve found it does help.
How To Store
Freezer: Store the ice cream in an airtight container in the freezer for up to 2 weeks. With that said, it is 100% best enjoyed within the first 24 to 48 hours after churning – it will be creamiest during this time. The longer it sits, the icier it will get.
Personally, we love to enjoy this ice cream about 2 to 3 hours after churning – giving it just enough time in the freezer to harden to the consistency of regular ice cream … and yet still perfectly soft and creamy in texture. It will also scoop super easily.
If you go longer, you can let the ice cream sit on the counter for about 10 to 20 minutes to soften before scooping.
Additional Dairy Free Dessert Recipes:
- Dairy Free Peanut Butter Ice Cream
- Dairy Free Cookies and Cream Ice Cream
- Dairy Free Peppermint Ice Cream
- Watermelon Coconut Milkshake
- Mango Coconut Ice Pops
- Coconut Mojito Ice Pops
Did you make this recipe? Rate and review it down below! I’d love to hear from you.

Dairy Free Mint Chocolate Chip Ice Cream
Rich, creamy and perfectly mint-y, this dairy free mint chocolate chip ice cream is a must for warm summer days! With the perfect texture and pale green color thanks to a secret ingredient, you’ll never believe this dreamy homemade dessert is dairy free.
Ingredients
- 1 (14 ounce) can full fat coconut milk
- ⅔ cup pure cane sugar (or granulated sugar)
- ¼ teaspoon fine sea salt
- 1 ¼ cups oat milk
- 1 teaspoon vanilla extract
- ¾ teaspoon peppermint extract, or more to taste
- ½ cup diced ripe avocado*
- 2 tablespoons vodka, optional**
- ½ cup chopped dairy free chocolate or dairy free chocolate chips
Instructions
- To a small saucepan, add the coconut milk, sugar and salt. Set the pan over medium heat and cook, stirring frequently, until the sugar has dissolved and the coconut milk is smooth. Remove from the heat, then whisk in the oat milk, vanilla and peppermint extract.
- Pour the mixture into a blender, then add in the avocado. Process until completely smooth and the avocado is fully combined into the mixture. Taste the mixture and add additional peppermint extract as desired (go very slowly!).
- Transfer the mixture to a medium bowl and refrigerate until well chilled, at least several hours (I usually do about 4 to 6 hours).
- Give the mixture a good stir (it thickens slightly in the fridge) then whisk in the vodka. Freeze in an ice cream maker according to the manufacturer’s directions, until it is the consistency of soft serve.
- Gently fold in the chocolate.
- Transfer the ice cream to a freezer safe container, then pop in the freezer for several hours, until hardened to the consistency of regular ice cream. Enjoy! {See the how to store section in the post above for important information on storing.}
Notes
Depending on your ice cream maker, don’t forget to place your churning bowl in the freezer for at least 24 hours before using so that it is properly chilled.
*Please don’t skip the avocado - it’s super important for this recipe. First, do not worry - you don’t taste it at all. It’s there for creaminess (it really helps give the ice cream the perfect texture) and it also gives the ice cream a faint green color. If you want your ice cream to have a deeper green color, add a few drops of food coloring to the blender.
**While the vodka is optional, it helps make the ice cream more scoop-able in texture (for more info see the tips & tricks section in the post). After churning, you won’t taste it at all. Additionally, while I’ve never had issues with vodka containing dairy, please check with the manufacturer if in doubt.
Nutrition Information:
Yield: 8 Serving Size: 1Amount Per Serving: Calories: 213Total Fat: 11gSaturated Fat: 8gTrans Fat: 0gUnsaturated Fat: 3gCholesterol: 0mgSodium: 73mgCarbohydrates: 30gFiber: 2gSugar: 26gProtein: 2g
Nutrition data shown is an estimate provided by an online calculator and is for informational purposes only. It should not be considered a substitute for a medical professional’s advice.

It looks amazing!
And thank you!
Why do you recommend oat milk?
Hey Carolyn! It tends to be a bit richer than other dairy free milks because of added fat – which is helpful for the texture. You could definitely use more coconut milk instead but I like how the oat milk balances out the flavor – you don’t really get any coconut taste here (as much as I love coconut it’s nice not to have the flavor all the time!).
Wish I were holding one of them 🙂
Yes! Perfect for this summer heat!