Dairy Free Chocolate Donut Holes
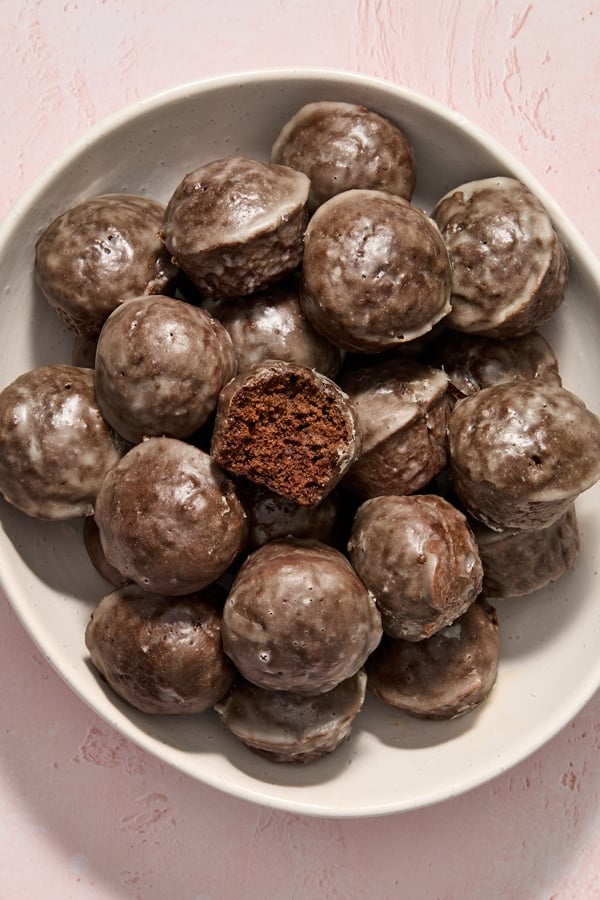
The whole family will adore these delicious dairy free chocolate donut holes! Baked not fried, they’re soft, fluffy and oh-so-chocolatey. And the best part? They couldn’t be easier to make – all you need is a mini muffin pan. Gluten free option included.

These dairy free chocolate donut holes were originally published in March 2013. The post has been updated as of October 2024 with new photos, text and an improved recipe.
These dreamy chocolate donut holes are the perfect easy treat – for breakfast or dessert.
A lightened up version of the deep fried ones you can find in a bakery, they are seriously good.
Soft, fluffy, ever so slightly dense and fudgy. And finished off with a simple glaze.
But the best part? You don’t need any fancy equipment. Just a few bowls and a mini muffin pan.
Which is a very good thing considering how fast they disappear – you can whip up another batch in no time!


Tips & Tricks
- When measuring out your flour, fluff it in the container then scoop into your measuring cup with a spoon and level off. Don’t dunk the cup straight into the bag as you’ll likely use too much.
- The same goes for the cocoa powder – scoop it into your measuring cup with a spoon and then level off.
- I haven’t tested it myself but I think the batter could be baked in a regular sized donut pan for about the same length of time. Check for doneness with a toothpick.
Substitutions
- Coconut sugar can be used in place of the light brown sugar.
- Melted coconut oil should work instead of the dairy free butter, although I haven’t tried this myself. If you do go this route, be sure that all your ingredients are at room temperature. If they are cold, you run the risk of the batter hardening up. Additionally, melt the oil first and then measure out the correct amount. Once melted, allow to cool for about 5 minutes before using (or you might scramble the egg).
- Along those lines, a different dairy free milk should work in place of the oat milk (but again, I have not tested this myself).


How To Store
These donut holes are 100% best enjoyed on the day that they are made, especially once glazed.
With that said, you can store them as follows:
Counter: Leftover glazed donut holes can be kept in an airtight container at room temperature for about 2 to 3 days.
Freezer: Unglazed donut holes can be frozen in an airtight container for up to 3 months. Thaw overnight in the fridge, then bring to room temperature and glaze.

Additional Dairy Free Chocolate Recipes:
- Dairy Free Chocolate Muffins
- Dairy Free Chocolate Cupcakes
- Dairy Free Chocolate Buttercream Frosting
- Dairy Free Chocolate Crinkle Cookies
- Dairy Free Fudgy Brownies
- Dairy Free Fudge
Did you make this recipe? Rate and review it down below! I’d love to hear from you.

Dairy Free Chocolate Donut Holes
The whole family will adore these delicious dairy free chocolate donut holes! Baked not fried, they’re soft, fluffy and oh-so-chocolatey. And the best part? They couldn’t be easier to make - all you need is a mini muffin pan.
Ingredients
For the donuts:
- 1 ¼ cups all-purpose flour*
- ¼ cup unsweetened natural cocoa powder
- ½ teaspoon baking soda
- ¼ teaspoon fine sea salt
- ⅔ cup oat milk
- ½ cup lightly packed brown sugar
- 1 large egg
- ¼ cup dairy free butter, melted and cooled slightly
- 1 teaspoon vanilla extract
For the glaze:
- 2 cups confectioners’ sugar
- ¼ cup oat milk
- ½ teaspoon vanilla extract
- pinch of fine sea salt
Instructions
For the donuts:
- Preheat the oven to 325ºF. Generously spray a 24 cup mini muffin pan with nonstick cooking spray and set aside.
- In a large bowl, whisk together the flour, cocoa powder, baking soda and salt.
- In a medium bowl, whisk together the oat milk, sugar, egg, dairy free butter and vanilla until well combined.
- Add the wet ingredients to the bowl with the dry ingredients and mix until combined.
- Scoop the batter evenly into the prepared muffin tins, filling about ¾ of the way full.
- Bake for about 10 to 14 minutes, or until a toothpick inserted into the middle comes out clean (a few moist crumbs attached is okay but you don’t want any wet batter). Allow the donut holes to cool for 5 minutes in the pan then remove to a wire rack.
- Let the donuts cool for another 10 minutes, then proceed with the glaze.
For the glaze:
- Whisk together the confectioners’ sugar, oat milk, vanilla and salt in a medium bowl until smooth. Add additional confectioners' sugar or oat milk as needed to achieve your desired consistency.
- Lay a piece of parchment paper underneath your wire rack (so the glaze doesn’t drip on your counter).
- Working one at a time, roll each donut hole in the glaze. Let the excess drip off then place on the wire rack to set.
Notes
These donut holes are best enjoyed the day you make them.
*To keep these gluten free - use a 1 to 1 gluten free all-purpose flour. I tested the donuts several times with Bob’s Red Mill Gluten Free 1 to 1 Baking Flour and we thought they came out great that way as well (not sponsored, just what I used).
Additionally, please be sure to use certified gluten free oat milk as needed for your diet.
Nutrition Information:
Yield: 12 Serving Size: 1Amount Per Serving: Calories: 206Total Fat: 5gSaturated Fat: 3gTrans Fat: 0gUnsaturated Fat: 1gCholesterol: 26mgSodium: 136mgCarbohydrates: 39gFiber: 1gSugar: 27gProtein: 2g
Nutrition data shown is an estimate provided by an online calculator and is for informational purposes only. It should not be considered a substitute for a medical professional’s advice.


I loved it.
So glad you enjoyed Emma!
These are fabulous!! My family loves them!
I’m in Colorado so for high altitude, I adjusted as follows:
Baked on convect at 325.
Generous 1/4 tsp baking powder
Added 2 Tbsp additional milk
2tsp vanilla extract
Glaze I preferred thinner so I added 1 1/2 cup powdered sugar to 2Tbsp milk + 2Tbsp Natural vanilla coffee creamer and 1/2 tsp vanilla.
I found it easier to put a small sieve (round sifter – whatever those are called) over my glaze bowl and then spooned the glaze over the donut holes that way they didn’t get too soaked.
So happy to hear that you all loved them Relene! And thanks so much for sharing the high altitude adjustments – super helpful!
Yes, I went straight to the dessert section 🙂 looks amaze-balls 🙂
haha thanks Renee!
Can you put a filling in these?
I think that could work but I can’t say I have ever tried it myself! Have fun if you give it a try : )
Yum yum yum! i’ve been craving chocolate doughnuts lately. Thanks for posting a baked doughnut recipe that doesn’t require a special doughnut pan!
My thoughts exactly : ) I don’t have (and don’t want to buy) a donut pan!
Oh I am absolutely drooling over these, chocolate cake donut holes are my FAVORITE!!!! 🙂 Beautiful photos
Thanks Tasha!
Ohhhhh I adore what you did with this recipe! Doughnut holes are always better than doughnuts, in my opinion 🙂 So cute!
Thanks Kristen! Agreed – I think I like them more for their cuteness factor lol
MMM I Love donut holes!! And love baking them, makes me feel that much better when I stuff my face! LOL
haha I know right? Totally an excuse to be able to eat a few extras!
you’ve got such a beautiful and crisp website. i love it. for 4 tbsp of butter to yield 24 donuts holes, that’s a winner in my book. pretty reasonable amount of fat. gorgeous photos.
I’m with you on the no frying thing…baked donuts are the way to go! I’ve had recipes pinned for a while that I hope to get to soon. These look so chocolatey and delicious! I love how they have coffee in them, because donuts always need coffee!
Agreed! Coffee and donuts go hand in hand : )
HOW CUTE ARE THESE! Agh sorry lol but I adore sprinkle-covered anything, especially chocolate donut holes. And baked means they are health(ier) and that I can eat a bunch of them right? 😉 Right heehee.
Enjoy your weekend Ashley!
Yes, you can totally eat more : ) haha