Dairy Free Pie Crust
Flaky and buttery in flavor, this dreamy dairy free pie crust is made with just four simple ingredients! And you’ll never believe there’s no butter involved thanks to a secret ingredient – coconut oil. Easy to make and perfect for both sweet and savory dishes, it’s also egg free, soy free and vegan.
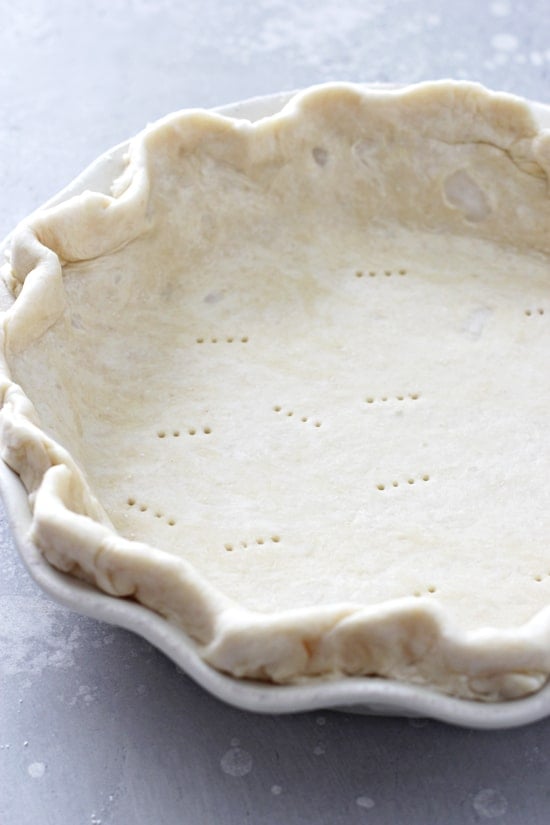
Today we chat everything you need to know about making a perfectly flaky dairy free pie crust.
Without the actual butter. <— Yes, it is definitely possible!
Now, maybe you find nothing more satisfying than making a delicious pie completely from scratch.
Or, maybe you’re like me, and just cannot find a pre-made dairy free pie crust at your local stores.
Either which way, we got you covered.
With this wonderfully classic crust. There’s no sugar included in the dough – making it fantastic for both sweet and savory dishes.
And, instead of any fake butter (which I find can leave a weird aftertaste depending on the brand), we’re using coconut oil instead.
Which makes the dough even easier to work with. Score.
So get those fillings ready – it’s pie making time!
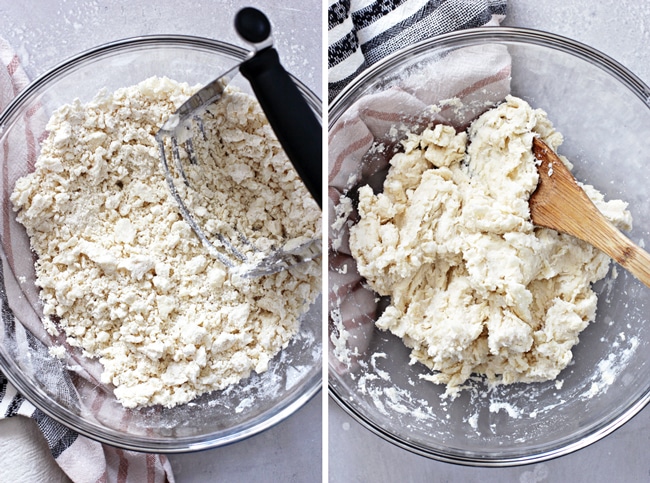
How To Make Dairy Free Pie Crust
Now, before we get to some important tips and tricks, let’s quickly discuss how this pie crust goes down.
Whisk the dry ingredients. First up, we’ll mix together some all-purpose flour and salt.
Cut in coconut oil. Next, we’ll use a pastry cutter to cut the oil into the flour, just like we would regular butter.
Form the dough. Then, we’ll stir in some ice cold water until the dough really comes together, before forming into a smooth ball.
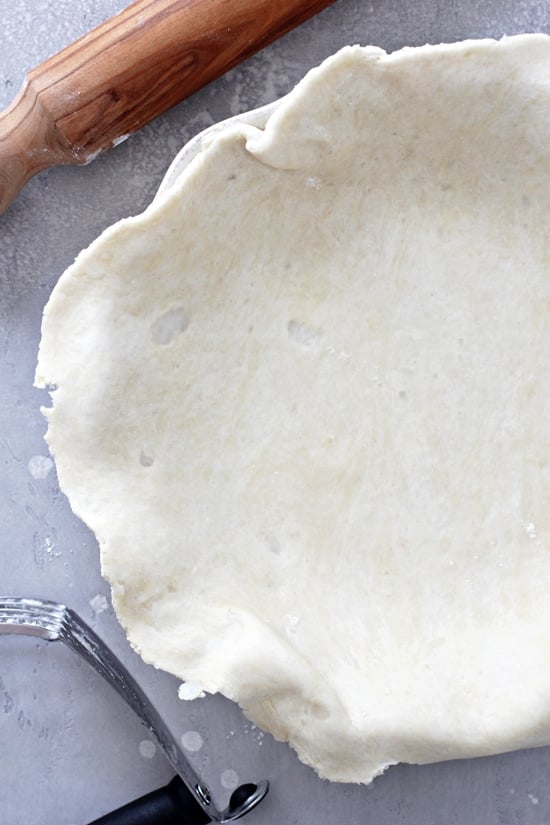
Roll out dough. We’ll transfer our dough to a floured surface and roll out into a circle.
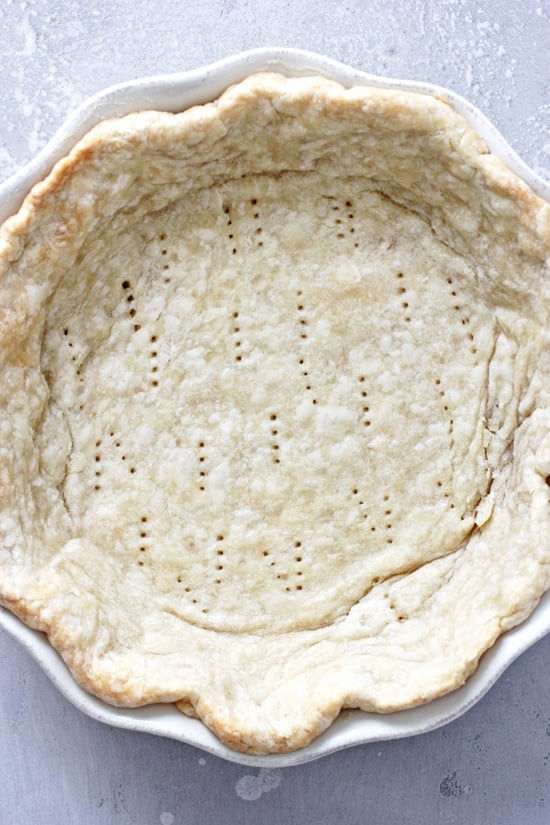
Chill until firm. After tucking into a pie plate, we’ll pop in the fridge and allow the pie shell to chill for at least two hours, until nice and solid.
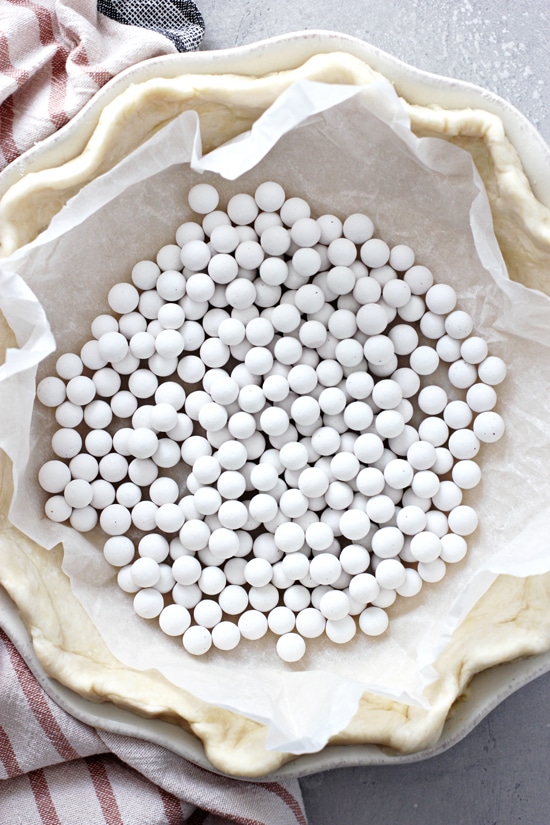
Add weights then bake. Finally, we’ll fill our chilled crust with pie weights and then bake off in the oven either partially or fully, depending on what kind of dish we’re making.
Tips & Tricks
- Please be sure that your coconut oil is scoopable in texture. This is SUPER important for ensuring that the dough is easy to work with and results in the best final crust. You don’t want it to be melted / drippy OR super cold / rock solid straight from the fridge. So adjust to get it to that happy medium.
- I personally use unrefined virgin coconut oil and don’t find that the crust tastes like coconut. But if this is something that concerns you, you can use refined coconut oil instead.
- Make sure that you use ice cold water – it’s important for the texture of the dough. I like to fill a container with water, add in some ice cubes and let it sit while I prep the other ingredients.
- When rolling out your dough, use gentle force with your rolling pin, starting from the center and working your way out in all directions.
- I find that coconut oil crusts don’t hold pretty designs quite like regular butter. So don’t waste your time trying to make the edges look super pretty – go for rustic instead!
- And finally, keep in mind that since we are using coconut oil the crust won’t get as deeply golden in color as a regular crust. Which is kind of nice since you don’t need to worry about the edges burning or using a pie shield.
Essential Steps For A Perfect Crust
Now, after a whole lot of testing, I’ve found that these two steps are ESSENTIAL for ensuring that your pie crust doesn’t shrink while baking – i.e. please don’t skip them!
- After you transfer and tuck your dough into the pie plate, take the time to use any excess dough to bulk up the sides as needed so that they are nice and sturdy and even. If a section is too thin, it can droop / shrink down while in the oven.
- Chill the pie shell before baking for at LEAST two hours. I know you might be tempted to rush this step but please don’t. You want the dough to be rock solid and firm before baking, otherwise it will bunch up and shrink in the oven.
How To Store
Counter: If you’re making a pie with a no bake filling (like chocolate or banana), you can bake off the pie crust as directed, let it cool completely, and then cover loosely and leave at room temperature overnight. Fill as desired the next day.
Freezer: You can also freeze the unbaked pie shell to use at a later time. Tuck the dough into the plate, prick with a fork and then let chill in the fridge until firm.
Place the plate in a large freezer-safe baggie or wrap well, then store in your freezer for up to 3 months. Let the shell thaw in the fridge, then bake as directed (straight from the fridge while still nice and firm and cold).
Additional Dairy Free Desserts You Might Enjoy:
- Dairy Free Chocolate Pie
- Dairy Free Pumpkin Pie
- Dairy Free Pecan Pie
- Vegan Blueberry Cobbler
- Dairy Free Carrot Cake
- Coconut Oil Oatmeal Cookies
- Dairy Free Brownies
Did you make this recipe? Rate and review it down below! I’d love to hear from you.
Dairy Free Pie Crust
Flaky and buttery in flavor, this dreamy dairy free pie crust is made with just four simple ingredients! And you’ll never believe there’s no butter involved thanks to a secret ingredient - coconut oil. Easy to make and perfect for both sweet and savory dishes.
Ingredients
- 1 ½ cups all-purpose flour
- ½ teaspoon fine sea salt
- ½ cup solid state coconut oil
- ¼ cup ice cold water, plus extra as needed
Instructions
- In a medium-large bowl, whisk together the all-purpose flour and salt. Add in the coconut oil and use a pastry cutter to cut the oil into the flour, continuing until it resembles even-sized crumbs.
- Add in the ¼ cup ice cold water and use a wooden spoon to stir until the dough starts to come together. Add in additional water, 1 tablespoon at a time, as needed to really bring the dough together (I usually need to add about 3 to 4 extra tablespoons). Use your hands to form the dough into a mostly smooth ball.
- Transfer the ball to a floured work surface, then flatten into a smooth disc with your hands. Sprinkle the top lightly with additional flour, then roll the dough out until you have a circle that is about 12 inches in diameter.
- Carefully transfer the dough to a 9 to 10-inch pie plate, then use your fingers to tuck the dough into the plate, making sure it is nice and smooth and that the sides are sturdy and even (using any excess dough to bulk them up as needed).
- Prick the bottom of the crust a few times with a fork, then transfer to the refrigerator to chill for at least 2 hours, until nice and hard (this is essential to prevent shrinking so do NOT skip!).
- Toward the end of the chill time, preheat the oven to 400ºF.
- Gently line the chilled pie crust with parchment paper, then fill with pie weights (or dry beans).
- Bake for 15 minutes. Remove from the oven, then carefully remove the parchment / pie weights. Stop here if you are pre-baking the crust for something like pumpkin pie, pecan pie or quiche - let the crust cool for 5 to 10 minutes, then proceed with adding your filling and bake again according to the recipe directions.
- To fully bake the crust for no bake pie fillings like chocolate or banana pie: Prick the bottom a few more times with a fork, then return the crust to the oven (i.e. without the weights /parchment this time) and bake for about 15 to 18 additional minutes, until lightly golden around the edges. Remove from the oven and let cool completely before adding your filling.
Notes
This is enough for one bottom pie crust. If you need a top crust as well, you’ll want to double the recipe. I’d also HIGHLY suggest checking out this post for dairy free apple pie (as you can see how I chill the dough differently when using two crusts and bake it off). I’d use the same method described in the apple pie recipe for other fruit pies with both a top and bottom crust.
Be sure to read the post above (especially the tips & tricks / two essential steps section) for more helpful info to give you the best pie crust possible!
Nutrition Information:
Yield: 8 Serving Size: 1Amount Per Serving: Calories: 207Total Fat: 14gSaturated Fat: 11gTrans Fat: 0gUnsaturated Fat: 1gCholesterol: 0mgSodium: 133mgCarbohydrates: 18gFiber: 1gSugar: 0gProtein: 2g
Nutrition data shown is an estimate provided by an online calculator and is for informational purposes only. It should not be considered a substitute for a medical professional’s advice.

Can this recipe be made in advance and either frozen or refrigerated then rolled out and used as needed?If so, how long would it keep either way.? I’m looking for a recipe I can make and save for making an unexpected company quiche or just for my grandson’s when they decide that is what they want for breakfast. ;D I look forward to trying this recipe either way! Thank you!
Great question! So, I’ve tested the following method for freezing the unbaked pie shell – tuck the dough into your pie plate as directed, prick with a fork and then let chill in the fridge until firm. Place the plate in a large freezer-safe baggie or wrap well, then store in your freezer for up to 3 months. Let the shell thaw in the fridge, then bake as directed (straight from the fridge while still nice and firm and cold).
I haven’t tried freezing just the dough and rolling it out later – my worry is that crusts made with coconut oil get pretty hard in the fridge (and are difficult to work with once chilled). If you do give it a try, please let me know how it goes!
My first time making a pie crust ever and I’m so grateful I found your dairy free recipe! Turned out PERFECT! I took a risk and only refrigerated the crust for 45min due to a time crunch and it was no problem. Can’t wait to try your chocolate pie later this week! This dairy free household is extra happy tonight! Thanks!!
This made my day! Thank you so much for taking the time to let me know 🙂
I used this for a pot pie recipe tonight. It tasted great! Easy to make, too.
So happy to hear this! Thank you for taking the time to let me know Holly 🙂
This is really good! I did not taste the coconut!
So glad you enjoyed Antoinette! Thanks so much for taking the time to let me know 🙂
That looks very flaky and great!