Dairy Free Apple Pie
This homemade dairy free apple pie is the ultimate fall dessert! With layers of sweet spiced apples and a flaky, buttery, coconut oil crust, you’ll never believe there’s no dairy involved. Vegan and egg free option included.
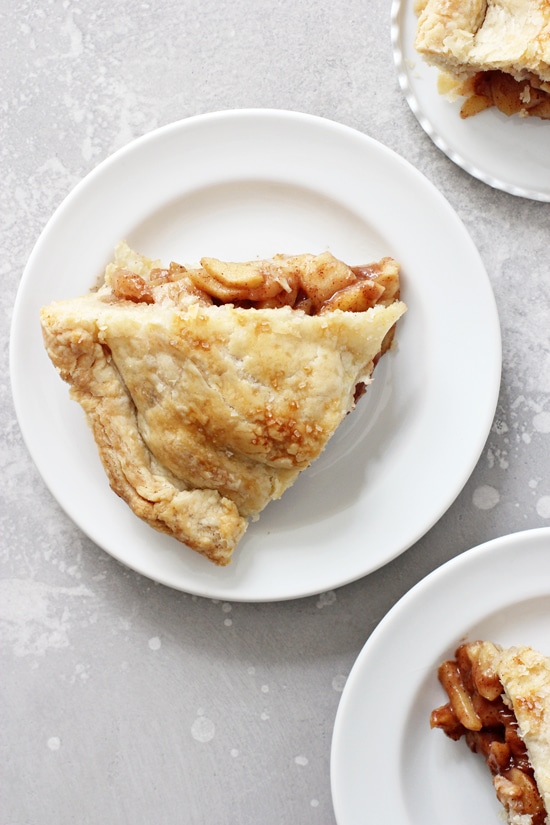
Fall baking season is upon us and what better way to kick things off than with this dreamy dairy free apple pie.
With it’s sweet juicy apples, warm spices and buttery flaky crust, this irresistible autumn dessert is just begging to be made asap.
Now. Since going dairy free, I’ll be the first to admit that this time of the year can be HARD. Especially, especially, as we get closer to the Thanksgiving and Christmas holidays.
All your friends and family are making delicious festive food … that’s usually packed to the brim with all things dairy.
SO. Today I bring you a pie that is JUST as good as ones made with butter AND that will fool your family into thinking there must be dairy involved. Real talk: there isn’t!
{And yes, I did test this out on several friends and they had no idea it wasn’t a regular apple pie.}
So bust out your rolling pin and let’s get cooking!

How To Make Dairy Free Apple Pie
While nothing about this pie is difficult, it does take some time to make. Here’s how it goes down:
Mix up the filling. First, in a large bowl we’ll toss together plenty of sliced apples, a squeeze of lemon juice, some sugar, flour and a good amount of warm spice.
Prepare the crust. Next, we’ll cut some solid state coconut oil into all-purpose flour and then add in ice water until the dough really starts to come together.
Roll it out. We’ll divide our dough in two and then roll out into two smooth circles.
Assemble the pie. We’ll tuck one of the circles into a pie dish, then spoon in all that delicious apple filling. The other circle gets placed on top and then we’ll seal off the edges and cut a few slits in the crust to vent.
Bake until golden. The pie gets popped in the oven and baked for about 1 hour, until lightly golden in color and the apples are nice and soft.
Be sure to let it cool for at least several hours before diving in. With your favorite non dairy vanilla ice cream of course!

Dairy Free Pie Crust
Now, I’ve tried using vegan butter in pie crust before and to be honest, I just didn’t love the way it turned out. {And I’m not personally a fan of shortening.}
Which brings us to today’s coconut oil crust. It’s nice and sturdy and incredibly easy to work with – I’d argue that it’s even easier to use than regular butter pie crust!
Added bonus? You can roll it out right away – no long chill time required.
And have no fear – it doesn’t taste like coconut in the final product. Just buttery, flaky goodness.
The only con I’ve noticed with this crust is that the edges don’t flute as nicely as pie made with butter. But that’s something I can DEFINITELY live with.
Let’s Talk Apples
Moving on. Let’s chat quickly about the apples. <— Kind of an important part of our pie!
As far as the type of apple to use in your apple pie, you want varieties that are crisp in texture. This way they bake up perfectly crisp-soft and not mushy. Granny smith, braeburn, honeycrisp and golden delicious are all great in pie.
Also, go for a variety of apples – it leads to better flavor in the final dish. For example, instead of all granny smith (which are pretty tart), use say a combo of granny smith and braeburn (which are sweeter to balance things out).
I personally like to use about ¾ of a sweeter variety and a ¼ of a tart variety, but you do you!
Tips & Tricks
- You want your coconut oil to be scoopable and not at all melted / runny for this recipe. <— This is super important! So, if yours IS melty, pop it in the fridge until it hardens up.
- Be sure to slice your apples so that they are uniform in size. This allows them to cook evenly and you won’t have a weird mix of hard and mushy apples in the final product.
- When rolling out your dough, start from the center and work your way out in all directions. This helps to keep things even and you’ll wind up with a circular shape.
- The pie plate that I use for this recipe measures 10 inches across and is just over 2 inches high at the tallest point. I’d suggest using something similar in size for best fit.
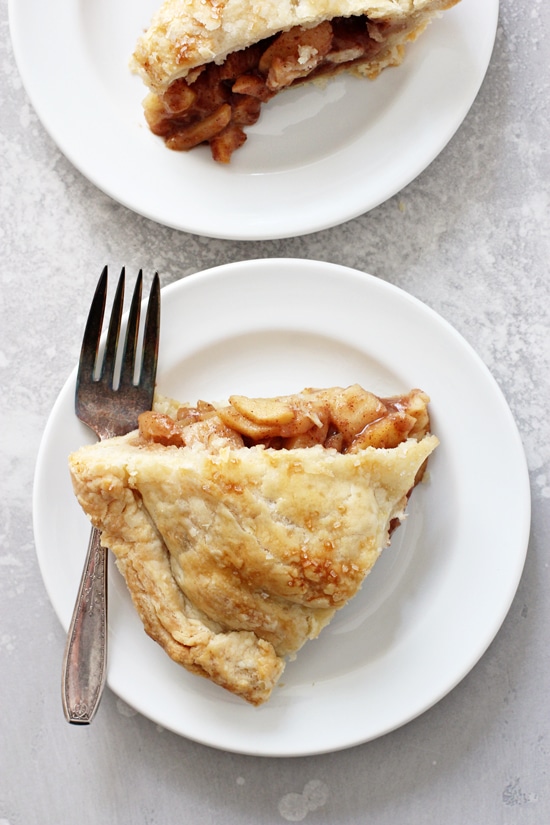
- And finally, keep in mind that since we are using coconut oil the pie won’t get as deep golden brown in color as a traditional butter crust.
How To Store
Cover the cooled pie and store either on the counter for 2 days or in the fridge for 4 to 5 days. Rewarm the whole pie or individual slices before enjoying.
Fully baked (and cooled!) pie will also freeze well for up to 3 months. Thaw the pie overnight in the refrigerator and rewarm before enjoying.

Additional Dairy Free Dessert Recipes:
- Dairy Free Pumpkin Pie
- Gluten Free Dairy Free Apple Crisp
- Dairy Free Chocolate Pie
- Dairy Free Peanut Butter Pie
- Dairy Free Pumpkin Cheesecake
- Dairy Free Pecan Pie
- Dairy Free Apple Cobbler
Did you make this recipe? Rate and review it down below! I’d love to hear from you.
Dairy Free Apple Pie
This homemade dairy free apple pie is the ultimate fall dessert! With layers of sweet spiced apples and a flaky, buttery, coconut oil crust, you’ll never believe there’s no dairy involved. Vegan and egg free option included.
Ingredients
For the filling:
- about 3 pounds sweet, tart and crisp apples, peeled, cored and sliced ¼ inch thick*
- 2 tablespoons freshly squeezed lemon juice
- ¼ cup pure cane sugar or granulated sugar
- ⅓ cup coconut sugar or lightly packed brown sugar
- ¼ cup all-purpose flour
- 1 teaspoon vanilla extract
- 1 ½ teaspoons ground cinnamon
- ¼ teaspoon ground nutmeg
- ⅛ teaspoon ground ginger
- ⅛ teaspoon ground cloves
- ¼ teaspoon fine sea salt
For the crust:
- 3 cups all-purpose flour
- 1 teaspoon fine sea salt
- 1 cup solid-state coconut oil
- ½ cup ice cold water, plus extra as needed
For the egg wash (see notes for vegan / egg free):**
- 1 large egg yolk
- 1 tablespoon water
- coarse or sparkling sugar, for sprinkling (optional)
Instructions
For the filling:
- To a large bowl, add the sliced apples, lemon juice, both sugars, flour, vanilla, cinnamon, nutmeg, ginger, cloves and salt. Mix until well combined. Set aside to rest while you make the crust.
For the crust:
- Preheat the oven to 400ºF.
- In a large bowl, whisk together the all-purpose flour and salt. Add in the coconut oil and use a pastry cutter to cut the oil into the flour, continuing until it resembles even-sized crumbs.
- Add in the ½ cup water and use a wooden spoon to stir until the dough starts to come together. Add in additional water, 1 tablespoon at a time, as needed, to really bring the dough together. Use your hands to form the dough into a rough ball, then divide in half.
- Use your hands to form each half into a fairly smooth ball, then transfer to a floured work surface. Flatten each into a smooth disc with your hands. Sprinkle the tops lightly with additional flour then roll each dough ball out until you have two circles that are about 12 inches in diameter.
- Carefully transfer one of the circles to a pie plate that is at least 2 inches high, then use your fingers to tuck the dough into the plate, making sure it is nice and smooth and that the sides are nice and sturdy (leave any excess dough hanging over the sides for now). Carefully transfer the other circle to a parchment lined baking sheet and then place both in the fridge to chill for 5 minutes.
To assemble:
- Spoon the filling, leaving behind any accumulated juices, into the bottom pie crust. Carefully lay the top pie crust over the filling. Use your fingers to pinch the edges of the two crusts to seal (trimming off any excess dough as needed at this point).
- Use a sharp knife to cut several slits in the top of the pie crust to vent, then place on a large baking sheet.
- In a small bowl, use a fork to beat together the egg yolk and 1 tablespoon water. Brush the top of the pie lightly with the mixture, then sprinkle with some coarse sugar if using.
- Transfer to the oven and bake for 20 minutes.
- Decrease the oven temperature to 375ºF and continue baking for about 40 additional minutes, until lightly golden brown (if the pie ever starts to brown too deeply, cover loosely with aluminum foil).
- Let the pie cool for at least several hours before slicing (this gives the filling time to thicken up so you don’t have a runny pie!). Serve as desired.
Notes
*You want about 8 to 9 cups total once the apples are sliced. 2 ¾ pounds to a little under 3 pounds should give you this amount.
**To keep this pie vegan / egg free, don’t use the egg wash. You can either skip the step completely OR brush the top of the pie lightly with some non dairy milk (canned light coconut milk works great for this). Just keep in mind the pie won’t brown quite as nicely without the egg wash (but it tastes exactly the same).
I’d encourage you to read the full post above, which includes tips and other information for baking up a perfect pie!
Nutrition Information:
Yield: 10 Serving Size: 1Amount Per Serving: Calories: 435Total Fat: 22gSaturated Fat: 18gTrans Fat: 0gUnsaturated Fat: 2gCholesterol: 0mgSodium: 269mgCarbohydrates: 55gFiber: 4gSugar: 20gProtein: 4g
Nutrition data shown is an estimate provided by an online calculator and is for informational purposes only. It should not be considered a substitute for a medical professional’s advice.

Can I pre-make this pie and freeze it until ready to eat? If so, do I cook it fully, let cool fully, then freeze? Then thaw day of thanksgiving and put in the oven to warm? Thanks!
Hi Heather! Yes, absolutely. Fully baked (and cooled!) pie will freeze well for up to 3 months. Thaw the pie overnight in the refrigerator and rewarm before enjoying.
I just put this in the oven! I am supper excited to try it. We won’t be eating it until Saturday afternoon. ugh…the wait! I add a 1 TB of sugar to the crust. I did some more reading on a dairy free crust with coconut oil. It suggested [demanded] that it be chilled for 2 hours before baking. Have you tried that? Should I be worried that I didn’t chill the dough prior? I actually thought about chilling it… I’ll follow back up!
Hi Kori! Hope you enjoyed the pie! I believe you’re talking about my recipe for dairy free pie crust – I mention it in that recipe but you don’t need to chill for the 2 hours as long as the pie has both a top and bottom crust (like this apple pie). That’s only necessary when it’s something like a pumpkin pie where the crust is only on the bottom.
HOLY TOLEDO!!! YUMMY!!This is a definite receipe keeper. I love the spices. Perfect! Thanks
This made my day – thank you so much for letting me know Lisa!
I made this apple pie and shared it with my friends- they had no idea is was dairy free and they finished it so quickly!! Couldn’t recommend this more ❣️
Love this! Thanks so much for taking the time to let me know Prag!
Any suggestions on making this gluten free also?
Hey Debbie! Hmmm I’d probably suggest using a different recipe unfortunately. I’m not sure the crust will behave the same without the regular flour (the filling on the other hand should be fine with some cornstarch in place of the flour – I’d probably use about 2 tablespoons).
This dairy free apple pie is amazing. I made two yesterday, and they were a hit in my family. The pie turned out amazing!! The crust recipe is very versatile, and could easily be used for both sweet and savoury pies, too! I highly recommend you try this recipe!!
I’m so happy to hear this Izzy! Thanks so much for letting me know 🙂
And yes! I actually have a whole post on the pie crust (if you’re using it for other things there’s a few other steps you’ll want to take to make sure it works just as well! – https://cooknourishbliss.com/2020/05/12/dairy-free-pie-crust/)
This crust turned out wonderfully and will def use going fwd in baking ! The filling was perfect – not too sweet which suited my guests and myselfthanks for well thought out recipe!
So happy to hear you enjoyed it Nicol! Thanks so much for taking the time to let me know 🙂
I made this pie for Thanksgiving- to bring. MY friend has a child that. Can’t tolerate any dairy. I would suggest measure out coconut oil before you refrigerate it. It is like wax and difficult to measure out otherwise. Haven’t tasted it yet.
Hey Maryann! Yes, coconut oil is hard in texture when in a solid state so it can be a pain to measure. I’d suggest measuring out more than you think you’ll need if you do it while warm / slightly melty and then remeasure after it’s in that solid state (otherwise you might use the wrong amount!). Hope you enjoyed the pie 🙂
I love a good apple pie! I enjoy making vegan dishes to bring to holiday gatherings and sort of tricking people into thinking they’re full of butter and eggs… may need to try this one for Thanksgiving or Christmas!
haha yes!
This pie is gorgeous Ashley,! That’s so awesome that nobody could even tell that the pie crust was made with coconut oil. I could never tell by looking at it! I’d love a big slice. 🙂
Thanks Marcie!
wow Can I come over and join you for the afternoon tea? The pie looks fabulous, Ashley.
haha of course! 🙂