Dairy Free Pumpkin Pie
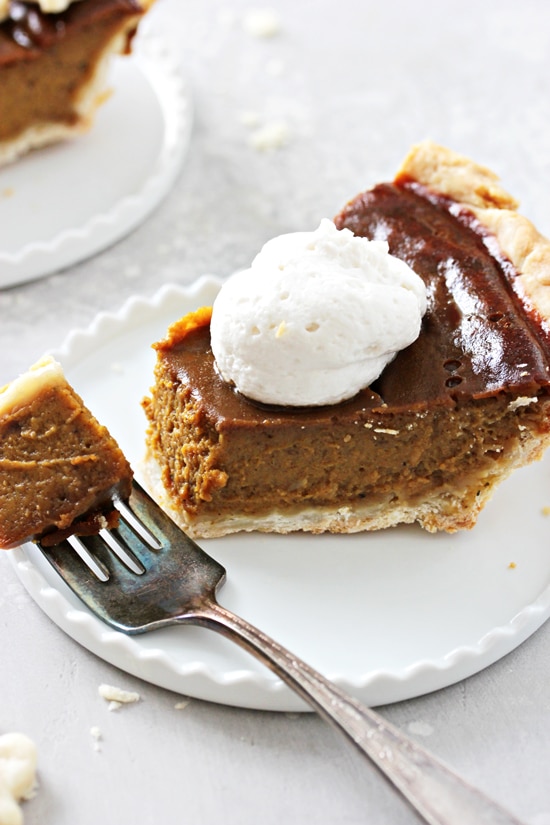
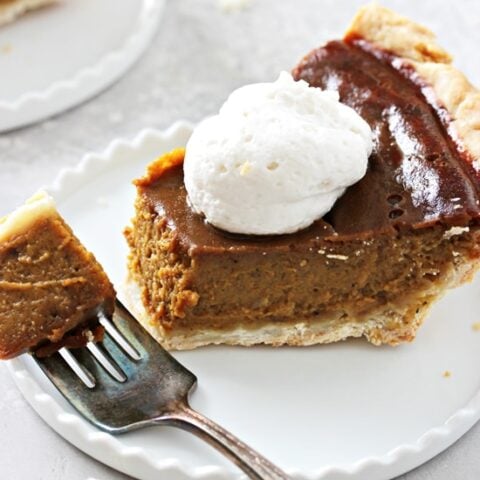
Nothing says fall baking like this incredible dairy free pumpkin pie! With a smooth, creamy and perfectly spiced filling, you’ll never be able to tell there’s no dairy involved. Easy to make with everyday ingredients, it’s sure to become a family favorite for the holidays. Soy free.
The holidays can be a challenging time when you’re dairy free.
You’re looking forward to gatherings with friends and family AND at the same time worried about what you’ll actually be able to eat.
My secret? Bring some of your own options.
Especially ones that no one will ever be able to tell are dairy free.
Like this incredible homemade dairy free pumpkin pie!
Rich, smooth and creamy thanks to a bit of coconut milk in the filling, your family will have no clue that there’s no regular milk involved.
And with a crispy, flaky crust and plenty of warm, dreamy spices? It’s pure holiday happiness.
How To Make Dairy Free Pumpkin Pie
So, let’s talk about how this delicious dessert goes down:
Make the crust. First up, we’ll prepare our dairy free pie crust and then pre-bake for about 15 minutes.
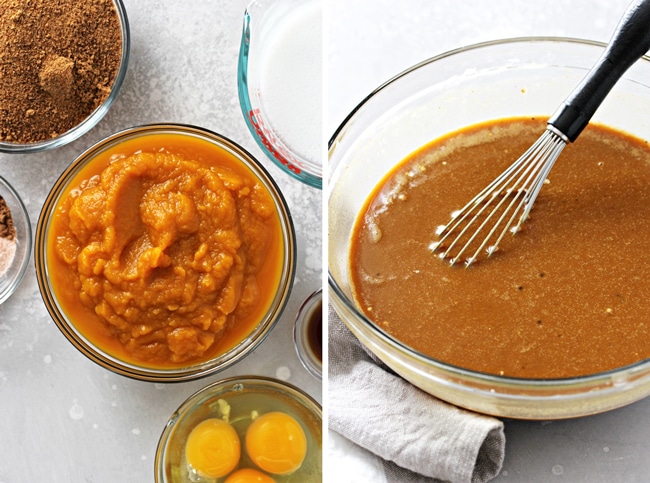
Assemble filling. While the crust cools slightly, we’ll beat together plenty of pumpkin puree, eggs, sugar, cornstarch, spices and coconut milk until smooth.
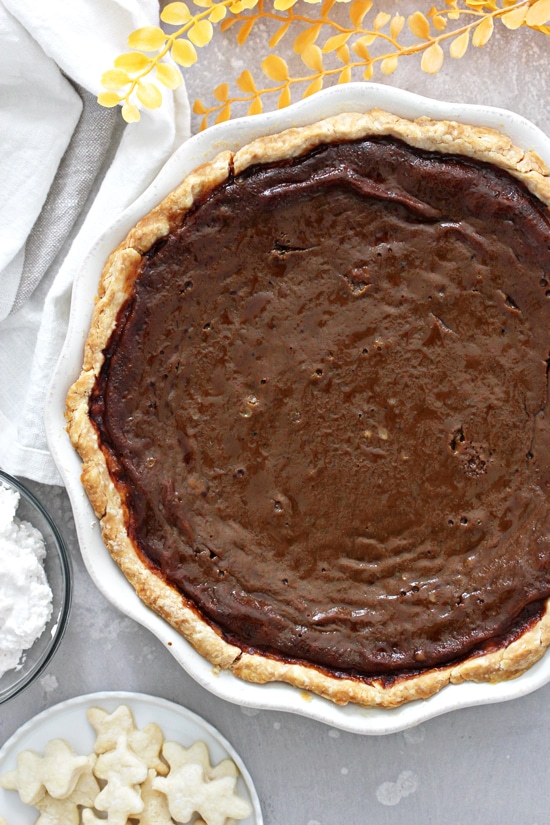
Bake until set. We’ll pour the filling into the crust and then bake until puffy and cooked through.
Let cool. Finally, we’ll let our pie cool to room temperature and then transfer to the fridge to chill overnight.
The next day, we’ll slice and serve with plenty of whipped coconut cream!
Decorative Pie Leaves
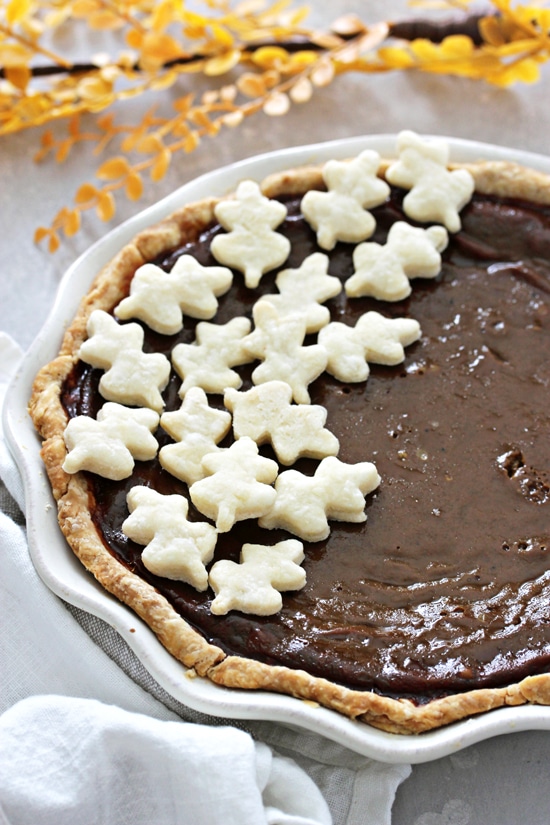
If you want to make the cute little pie leaves for decorating, here’s how to do it:
- Make extra pie dough then roll out and cut using a mini cookie cutter.
- Place the leaves on a parchment lined baking sheet, then chill briefly until firm (about 30 to 45 minutes).
- Bake in a 350ºF oven for about 20 minutes, or until cooked through and lightly golden brown.
- Once the pie is baked and cooled to room temperature, add them to the top of the pie as desired.
Tips & Tricks
- If you want to avoid any clumps of cornstarch in your filling – whisk together the sugar and cornstarch in a small bowl before adding to the large bowl with the other ingredients.
- Lightly packed brown sugar should work just fine in place of the coconut sugar.
- Now, I know the pinch of pepper in the filling may seem a bit weird but trust me and do it. You won’t be able to tell it’s there but it adds a little something special – kinda sorta like chai spice.
- I haven’t tried it myself but I *think* you could substitute either dairy free coffee creamer (unsweetened) or dairy free half & half / dairy free whipping cream for the coconut milk. Just be sure to stay away from plain almond milk / cashew milk / oat milk, etc. – they’ll be too thin and watery. You want something with a bit more body. Please let me know if you give this a try!
- And finally, the pie filling is gluten free – so you could absolutely use a different crust if needed for your diet.
How To Store
Fridge: The pie will keep covered in the refrigerator for about 4 to 5 days.
Freezer: You can also freeze the pie (wrapped well) for up to 3 months. Thaw in the fridge before enjoying.

Additional Dairy Free Desserts You Might Enjoy:
- Dairy Free Apple Pie
- Dairy Free Peanut Butter Pie
- Dairy Free Chocolate Pie
- Gluten Free Dairy Free Apple Crisp
- Dairy Free Pecan Pie
- Dairy Free Pumpkin Cheesecake
- Pumpkin Olive Oil Bread
Did you make this recipe? Rate and review it down below! I’d love to hear from you.
Dairy Free Pumpkin Pie
Nothing says fall baking like this incredible dairy free pumpkin pie! With a smooth, creamy and perfectly spiced filling, you’ll never be able to tell there’s no dairy involved. Easy to make with everyday ingredients, it’s also soy free.
Ingredients
- 1 batch dairy free pie crust*
- 1 (15 ounce) can pumpkin puree (not pumpkin pie filling)
- 1 cup coconut sugar
- 2 large eggs plus 1 large egg yolk
- 1 tablespoon cornstarch
- ½ teaspoon fine sea salt
- 1 ½ teaspoons ground cinnamon
- ½ teaspoon ground ginger
- ¼ teaspoon ground nutmeg
- ⅛ teaspoon ground cloves
- pinch of ground pepper
- 1 teaspoon vanilla extract
- 1 cup canned full-fat coconut milk (fully combined)**
- whipped coconut cream, for serving
Instructions
- Make your pie dough, then pre-bake the crust according to the recipe directions (see the linked pie crust recipe for details - be sure to plan ahead as the crust needs time to chill in the fridge before baking).
- Increase the oven temperature to 425ºF, then let the crust cool for about 5 minutes while you make the filling / the oven heats.
- To a large bowl, add the pumpkin puree, sugar, eggs, egg yolk, cornstarch, salt, cinnamon, ginger, nutmeg, cloves, pepper, vanilla and coconut milk. Using a hand mixer, beat until smooth and well combined (or whisk really well by hand).
- Pour the filling into the warm crust.
- Bake for 15 minutes at 425ºF.
- Reduce the oven temperature to 350ºF and continue to bake for about 55 to 60 minutes, until the filling is puffed, set in the center (if you touch the center of the pie gently with your finger it shouldn’t be wet, just a little sticky) and a touch wobbly / jiggly.
- Remove from the oven and set the pie on a wire rack to cool completely, at least 3 to 4 hours. Then transfer to the refrigerator to chill for at least several more hours or overnight.
- Slice and serve with your favorite whipped coconut cream!
Notes
*You can absolutely use a different pie crust recipe or a store-bought crust. With that said, the pie plate that I use for this recipe measures 9 ½ to 10 inches across and is just over 2 inches high at the tallest point. I’d suggest using something similar in size for best fit.
Additionally, recipe time does NOT include time to prepare or pre-bake the pie crust.
**You want your coconut milk to be fully combined and not at all separated before measuring out the 1 cup. I like to add 1 can of coconut milk to a microwave safe liquid measuring cup and heat briefly, stirring often, until combined. You don’t want it to get hot - if it does, let it cool to room temp before proceeding.
Nutrition Information:
Yield: 10 Serving Size: 1Amount Per Serving: Calories: 326Total Fat: 18gSaturated Fat: 14gTrans Fat: 0gUnsaturated Fat: 2gCholesterol: 74mgSodium: 239mgCarbohydrates: 38gFiber: 1gSugar: 20gProtein: 5g
Nutrition data shown is an estimate provided by an online calculator and is for informational purposes only. It should not be considered a substitute for a medical professional’s advice.

We made this for thanksgiving and it was a huge hit with everyone, even the non-dairy -free-ers! This will definitely be a regular recipe in our family. Thank you!
I love this! Thanks so much for letting me know Nicole! 🙂
I never expected but my lactose intolerant daughter absolutely loved it. She has been asking me to make it again every day. Thank you so much
This made my day – so happy to hear this!
I find this to be the case for being plant-based too… I bring dishes that everyone loves, and I guarantee that I’ll have things to eat! 🙂 You are so good about being on it in advance with the holiday recipes!!
Exactly! Thanks Nicole 🙂
I would devour the whole pie if I made this. LOL…no kidding..it has EVERYTHING I love…warm spices, coconut milk and sugar and pumpkin…totally right up my alley.
haha I love it!